C-Sharpe
C# Is a modern, object-orientated programming (OOP) language created by Microsoft in 2002 for their all new .NET Framework. Since '02, C# has been used across many frameworks for all different types of platforms. For example; Windows has .NET Framework; Andoird & IOS have Xamarin; Windows, OSX, and Linux have Mono. There are other frameworks that support C#, but they're less known.
Note: Everything below assumes you're using windows.
Contents
This is all WIP and hasn't been read over[edit]
Setup[edit]
Before we dive into the programming language, we need to setup a few things. First we will need to install an IDE (Integrated Development Environment). The easiest IDE to use and install would have to be Visual Studio. So let's go to their Download Page. After going to the download page, you want to download Visual Studio Community Edition (It's the free one). After downloading Visual Studio Community Edition, you want to install it. Make sure to run the installation executable as an administrator. After waiting a few seconds, you will be prompted with a installation screen. The first screen you're prompted with is a Terms of Service agreement, and a Privacy Statement. You can click continue without reading, although we advise you to read it. If you clicked continue, you will be shown a new screen, this screen has checkbox's for things you wish to install. Check .NET Desktop Development, then hit install. The rest of the installation steps are unique for you.
Hello World & Visual Studio Introduction[edit]
Creating Project[edit]
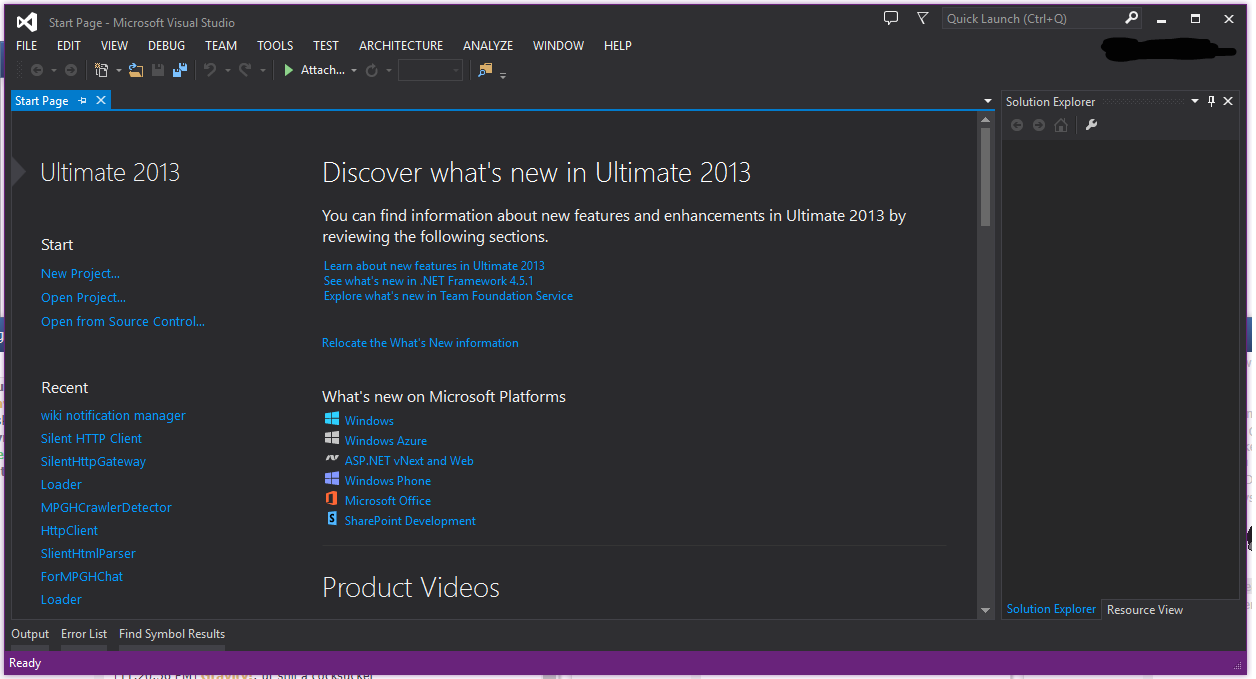
First lets open Visual Studio. Upon opening you will be shown a page like this (image). Mine might be slightly different because I'm using an outdated version of Visual Studio. Okay, so now we want to create a new project. This can be done through the File button at the top left, or at the New Project button in the Start Page tab. Image. When clicking that button, a window like this (image) will appear. At this screen you can pick your desired programming language, type of project, and the project's name. We want to select Visual C# for the language, for the type we want a Console Application. Your screen should look like this if you followed the instructions correctly. Now we want to click OK.
Breakdown of what you see[edit]
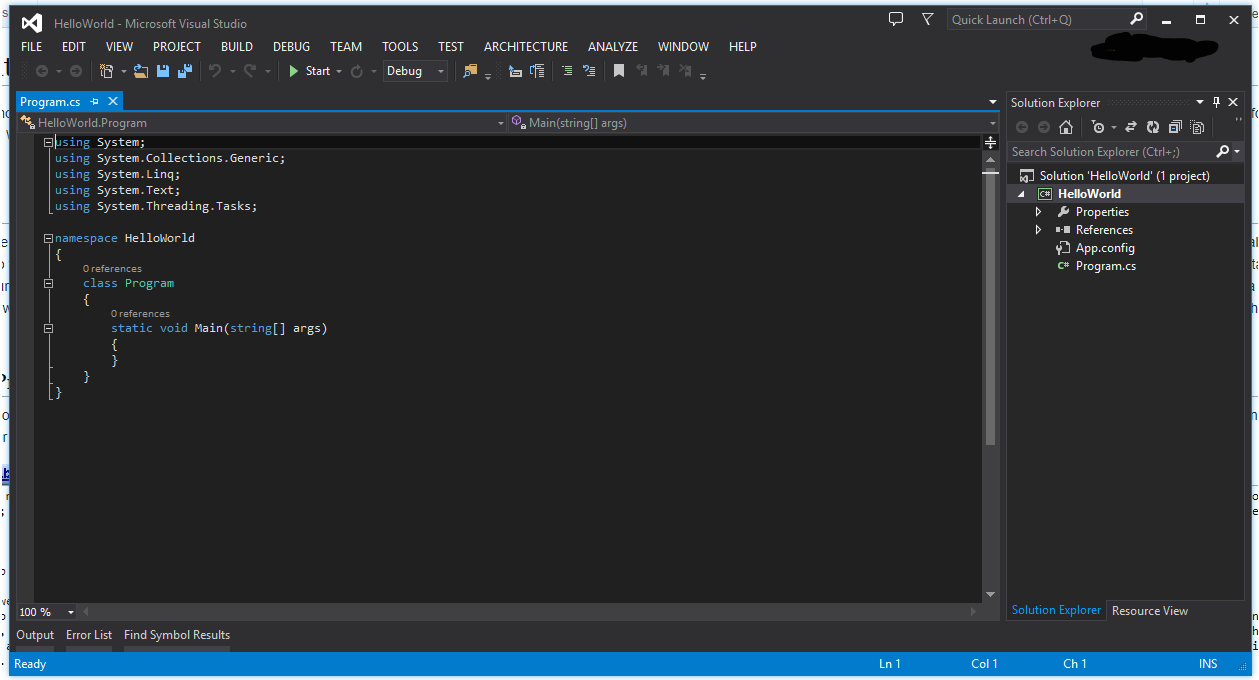
If everything was followed correctly, you should see a screen like this. Let's break down what you see.
Topbar[edit]

We will not breakdown everything on this bar just yet, it will just introduce confusion. The only thing on this bar that a relevant to us right now is the start button and save button.
Solution Explorer[edit]
By default, this is located on the right of your screen. Solution Explorer has a full layout of your projects files, properties, and dependencies. The properties tree-index by default has a file called AssemblyInfo.cs. AssemblyInfo.cs has information about the application after you have compiled it. We can just leave AssemblyInfo in its default state. The references tree-index has a list of your projects dependencies. This will not be needed right now. The App.config has pre-runtime information that can tell windows information about the executable. This can also be ignored.
Now we got the boring things out of the way, we're up to the Program.cs file. This is where your main entry point is. What is our main entry point? It's the first chunk of code that's executed. Program.cs will be our main focus.
Code Editor[edit]
This is basically where we edit out code. You can have multiple tabs, you can merge tabs together by simply dragging the tab. No further explanation required.
Making our Hello World code[edit]
Okay, now we've done the very basic Visual Studio introduction, we can make the Hello World code. This will be very basic, we will simply output the text "Hello World" to the console, then wait for user input. So to output text we can use either call the function Console.WriteLine or Console.Write. What's the difference between the two functions? Console.WriteLine will create a new line after the text we output, and Console.Write requires us to manually output the new line. For simplicity, we will use Console.WriteLine. When I described what we want the Hello World program to do, I said output Hello world, then wait for user input. So when listening for user input, we can use Console.ReadLine or Console.ReadKey. Console.ReadLine returns a value, a string, while Console.ReadKey doesn't return anything, it simply waits for a user to press any key then the program will continue on its way.
Program.cs explanation[edit]
- Now I'll begin to explain the default code in Program.cs.
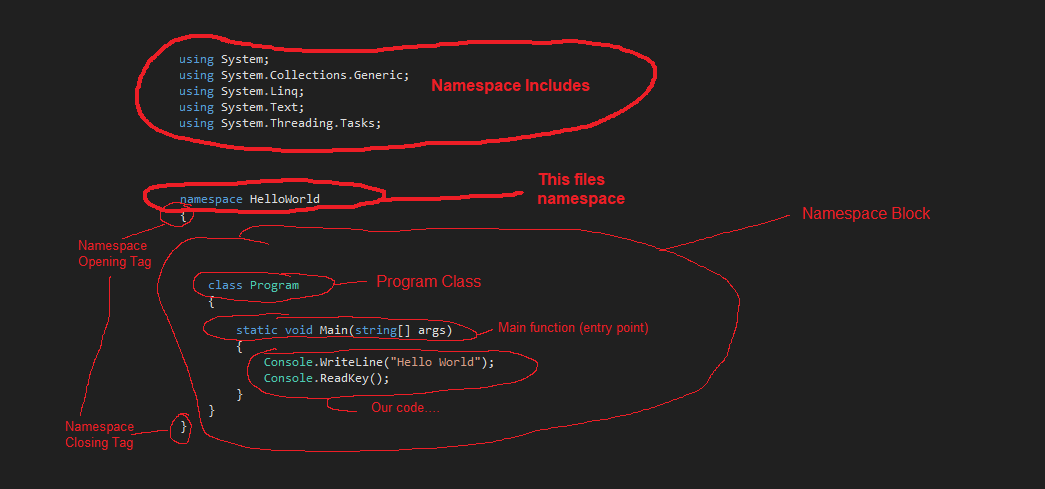
We want to go over to our IDE (Visual Studio) and locate the Program.cs file in the Solution Explorer. Double click it, and you will be shown the main project file that has the entry point. In this Program.cs file, you will see a few things. Up the top you can see your namespace includes. Namespace includes basically let you include other files, or dependencies. A little under that we can see the namespace of the current file, it will be 'namespace HelloWorld'. Then it will have a block of code. What is a block of code? It's basically all the text between '{' and '}'. '{' is the opening tag, '}' is the closing tag. Within the namespace block of code, we will have the class name, which will be 'class Program' which also has a block of code. Within the Program class block of code, there is our main function. The main function is where we put our code.
Adding our code[edit]
- Placing our code in main function.
So, now we simply want to put our WriteLine function and ReadKey function in the main functions block of code (aka entry point). Lets put Console.WriteLine passing the parameter "Hello World," that will look like Console.WriteLine("Hello World");. This is enough to run our application, but it will instantly close. To prevent the closing, we must wait for user input. To wait for user input, put Console.ReadKey(); after the writeline.
Our code[edit]
Explanation of code, blocks, and other things click here (image)
   using System;
   using System.Collections.Generic;
   using System.Linq;
   using System.Text;
   using System.Threading.Tasks;
   namespace HelloWorld
   {
       class Program
       {
           static void Main(string[] args)
           {
               Console.WriteLine("Hello World");
               Console.ReadKey();
           }
       }
   }
(sorry about the broken code tags)
Complete Hello World[edit]
